Saturday, December 31, 2011

Makeup Boards

Today I was able to have a craft day with two of my main chicas, with one goal in mind! Makeup boards to attempt to add some creative organization to our lives!

Makeup Board

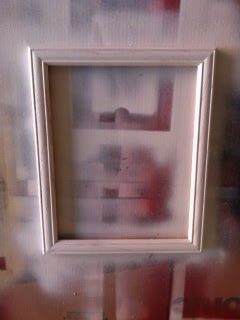
First, find your frame! You know I love me a good deal at the local DI! I got mine for $1.50.
Prime your frame if you are wanting to switch up the color.
Spray paint your board when primer is dry. I LOOOVVEE this color! Ivy Leaf from Krylon.
After the paint dried, I antiqued the frame using Valspar Antiquing Glaze in Ashphaltum (black).
I found my metal sheet at Hobby Lobby for $5.75 (after 40% coupon). I am not sure this is the best deal but its easy to work with and cut if needed. My frame is a 11x13-so I cut the metal down to size using tin snips.
Fabric, metal sheet and the Elmers spray adhesive I used.
Cut the fabric so it slightly overlaps your metal sheet (to avoid fraying of edges). Spray sheet with spray adhesive and lay on to fabric. Use your hands to push down and smooth out any wrinkles in the fabric.
Spray the outer edges of the metal sheet so you can fold over the edges of the fabric.
These were the flowers I made to embellish the frame.
For brush holders, you can get really creative. I have used empty pill bottles for my own makeup board and covered these with patterned scrapbook paper. Natalie's friend Brianna had the good idea of spray painting a kids cup and tying a cute bow around it for Natalie's board. For this board I am cutting down a bottle that my Crystal Light packages came in. Cover the holder and glue a magnet on back.


Glue magnets (this roll I bought at Hobby Lobby for $2.50) and cut pieces to fit the back of each individual makeup piece you want on your board.

Put sheet into frame, glue on flowers, and attach makeup to board! Done! :)

I love all the different boards everyone can come up with! 
Here is Natalie's board in her favorite color (partly made by her oh-so-creative friend Brianna)
Here is Amber's cute board to match her bedroom...
And here is the first makeup board I made, it matches perfect to my bathroom. I have loved how easy it is to stay organized and keep the bathroom clear of clutter especially in our bathroom that doesn't have a lot of counter space. Just hang on the wall and its like organizational artwork! 

Pin It!

Simple Jewelry Stands

My creative boss Jen gave me this awesome idea for simple jewelry stands. They are pretty simple and fast to do!

First, find your frame. Many unique options are found at the D.I., that just need some updating. Mine were frames I bought overpriced forever ago that I never did anything with, so their time has come! Both of mine shown are to fit 5X7 pictures-I thought this was the perfect size for what I wanted to do with them. I figure mine will be to display perfumes and catch my jewelry that I usually just leave laying around on my nightstand.

Second, prime you frames if you are wanting to change up the color. I usually use one or the other out of these brands of primer. They are about evenly priced but lately I am preferring the Rustoleum over the Kilz. Like it says, two times the coverage-and they aren't lying. On small projects like this-I usually only need the one coat-and sometimes go back a second time to make sure I didn't miss any spots.
 After frames have dried, I turn them over to super glue on the small wooden knobs (I found mine at Hobby Lobby in the wood section). My knobs came in a package of eight which cost me only 1.50 for the bag.
I then took the fames back out to the garage for some color! One I painted black and the other yellow with a little dark antiquing. These are the colors I used for my frames.


Next, take the cardboard piece that comes with the frame--often behind the picture of the "too cheesy" couple embracing--and cut a piece of fabric to spray adhere on to the cardboard. I use Elmer's Spray Adhesive (found at Hobby Lobby, and only $3 after 40% coupon!) and it works awesome. Cut the fabric to overhang the edges a little and spray adhere the edges down on the overlap on the backside of the cardboard.
Make sure to leave the glass our of the frame, replace the fabric covered cardboard back into frame, and you are finished! It would also look cute to add embellishments if wanted, but I preferred to keep mine plain.


Pin It!

Friday, December 30, 2011

Recycled Ties

I seriously have no idea how I really lived before Pinterest came along. My Facebook addiction has about come to a close and has been replaced with only the love that hundreds of thousands of crafty women can give you.-its almost sickening how much I love that site.

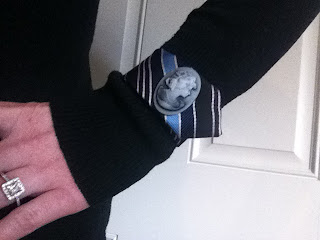
My new favorite trend is recycled ties and all the fun things you can do with them. I have a couple of things I want to try with them but recently made a few bracelets. Friends wanted me to post how I made them so here it is!


 Luckily, this is one item that your local D.I. will always have a heavy supply of, and are priced at $2.00 a tie.

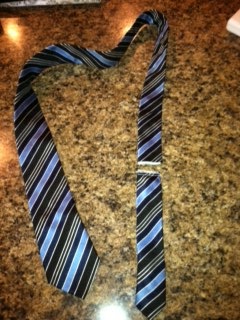
Being the thrifter (some call it 'cheap') person that I am, I thought, $2.00 for one bracelet?! And looked into other ways I could use the same tie and get the most use out of it. With one STANDARD tie, I have found that you can use the skinny end (the part that is hiding when tied) and make that into a bracelet-and use the remainder of the tie to make a iphone holder! WAHOO! Let the projects begin!

Tie Bracelet
First pick your tie! Measure the distance around your wrist and add about an inch for overlap and a half inch for hemming. I cut mine at 7 1/2in". The picture shows the end already surged with a surger sewing machine. (I would actually recommend NOT doing this-the ends are white and easily seen). I would say using a simple whipstitch would be best with a color of thread closest to the color of your tie.  Sew the end of your tie to keep it from fraying.

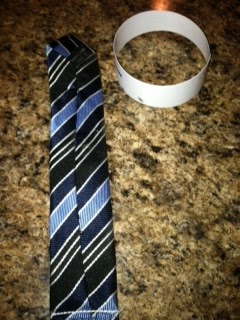
Next, find a cup and recycle! Thank goodness I went to Maverik earlier and got me that Mtn. Dew! Who knew it would benefit me in more ways than one? Using regular scissors, not fabric ones, cut around the cup in inch thick strips. The strip will be used as a way to stiffen the bracelet and give it the shape.

Here is the tie and strip I cut.
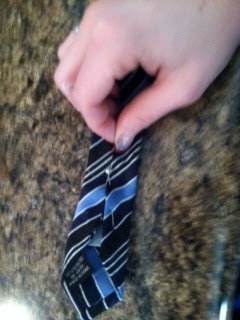
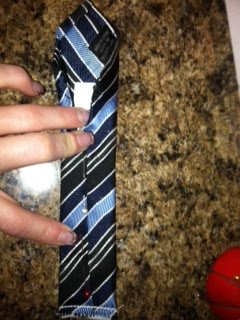
On most ties, the ends are held together by a occasional stitch. In order to be able to place the strip inside the tie, the seam will need to be ripped and re-sewn. Use a seam ripper to do this easily.

Once the tie is opened (cut off part should still be sewn-holding the tie together at bottom), place the strip inside. Use a couple of pins to pin up where you will need to do a running stitch to hold together again. Make sure that you cut the cup strip to the length that it will barely NOT be showing out the diamond at the top.

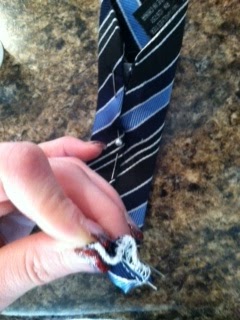
I pinched the ends of my tie and took a simple stitches around to keep it pinched (this will make it easier to hide my white surged ends). You will probably not have to do this, if you didn't surge your cut of end like I did.
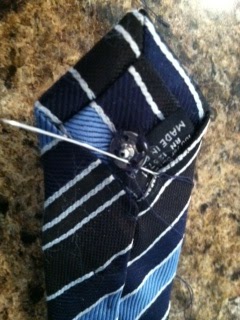
Using that same long piece of thread, make a simple running stitch (up and down) from the bottom (the cut off end) to the top (at the bottom of the diamond). Use the remainder of the thread to sew on one of your snaps right below the diamond. I sewed in each corner of the snap about 6 times to ensure its strength.
Knotting the string after sewing on "male" snap, I threaded a new piece and sewed on the "female" snap to the reverse side of the other end.

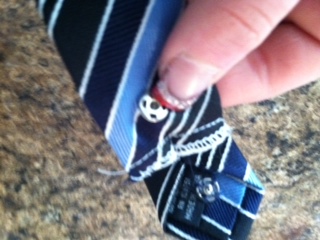
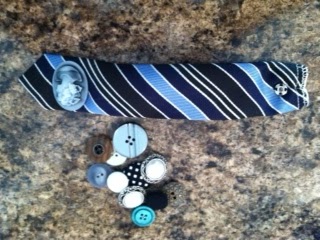
Knot this thread after sewing on. Pick a button that you like. I found this cool vintage in place of a button among my mom's craft stuff (she's a gem). Since it is not a button, I used super glue to keep in place. (Sorry its upside down!)

You are done! Now you have a fun tie bracelet!

Here are a few I've made. For skinnier bracelets, I've just used the same steps but made them out of "skinny ties". The thinner ones in the picture are made out of skinny ties. They make fun gifts!
IPhone Wallet
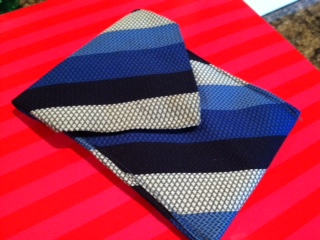
I was amazed at how easy it was to make. Of course, I got so excited that I forgot to take the step-by-step pics. Here are some pics of the wallet.

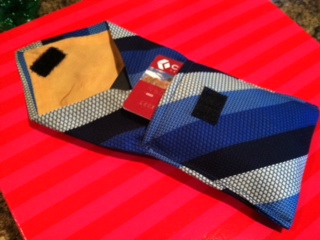
Here is the inside...


I think that a "girly" version I will be making soon for myself will include a small hand strap so I can take it with me when I'm somewhere where I don't want to bring my whole purse! Oh Pinterest. How I love you.

Pin It!